Subscriber Exclusive
1 Bag to Weave, 3 Looms from Which to Choose!
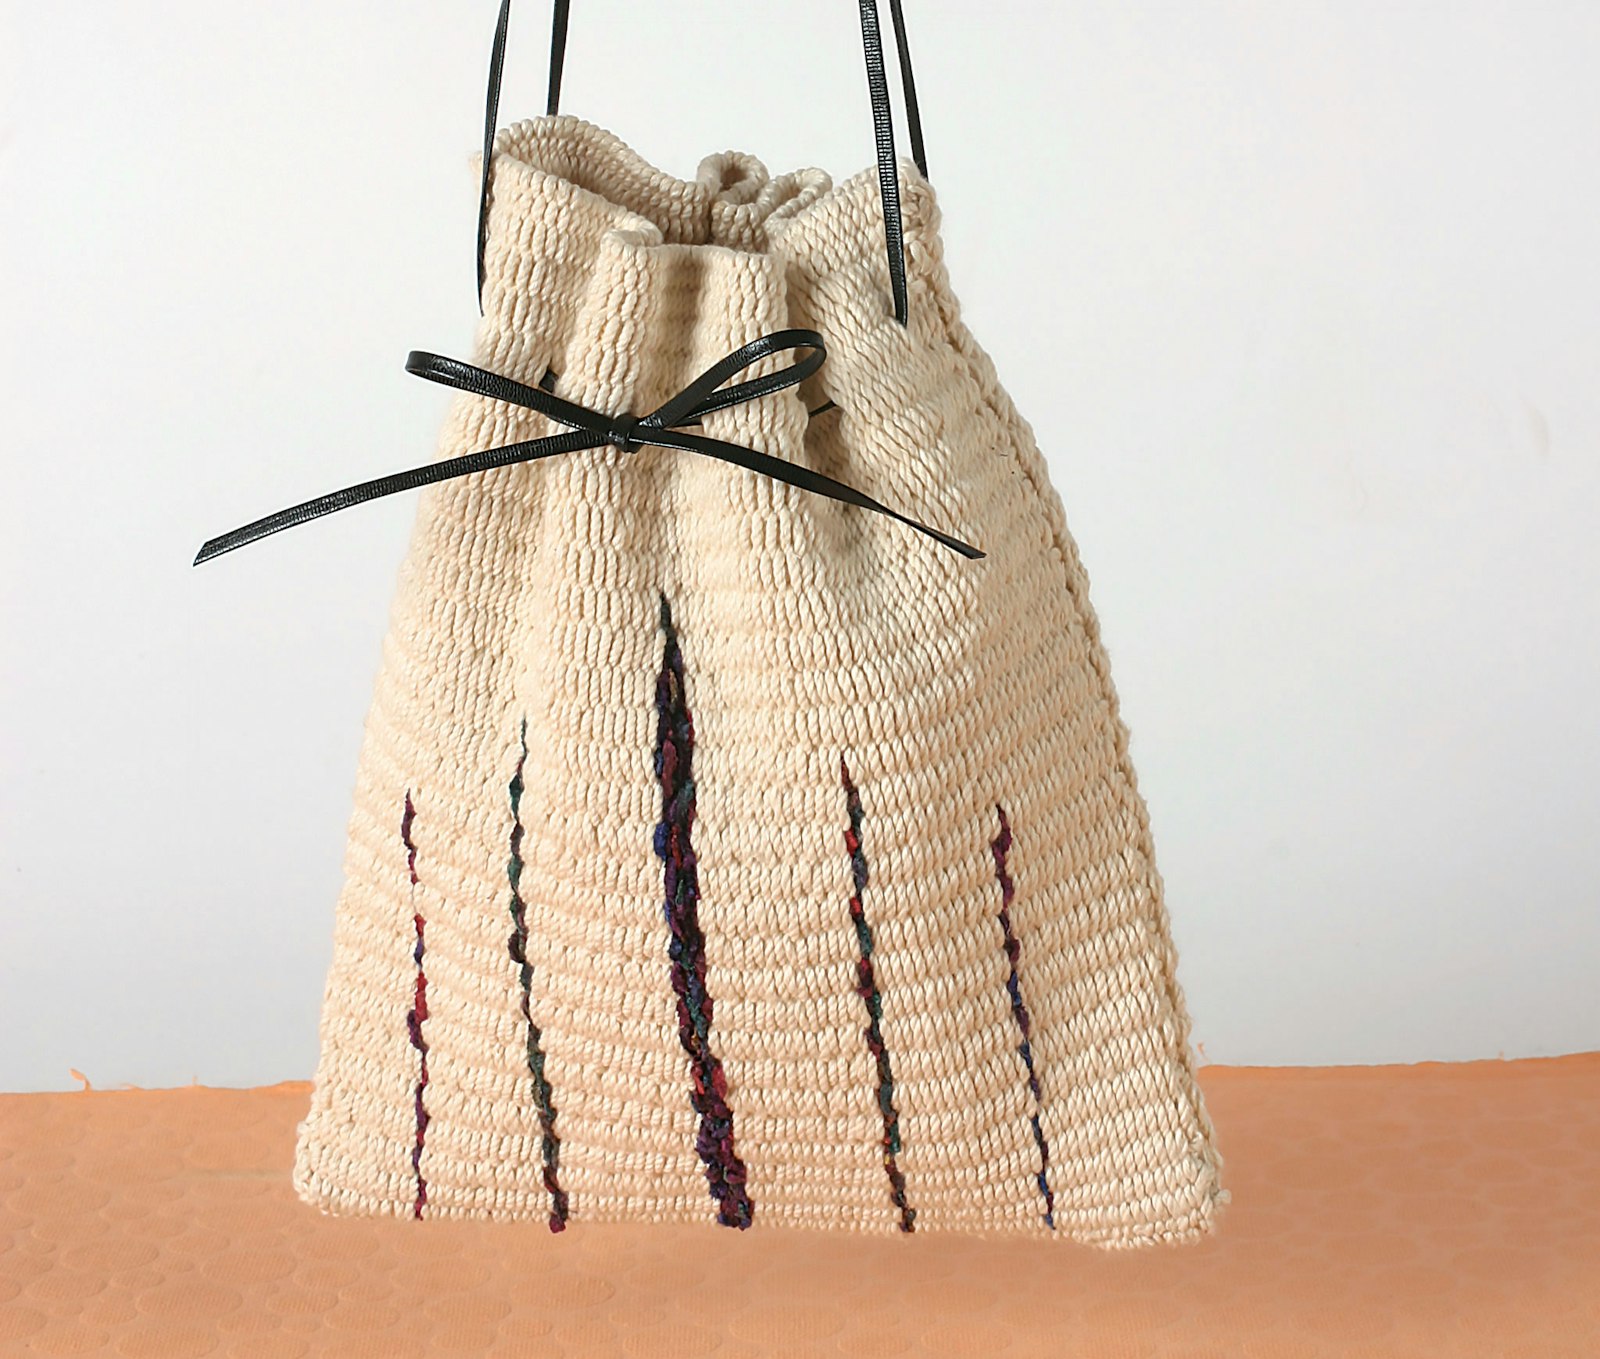
Learn how to weave this beautiful bag on a peg loom—or use our bonus instructions to make it on a rigid-heddle or frame loom you already have.
Learn how to weave this beautiful bag on a peg loom—or use our bonus instructions to make it on a rigid-heddle or frame loom you already have. <a href="https://littlelooms.com/one-bag-three-looms-to-choose-for-weaving/">Continue reading.</a>
https://littlelooms.com/cdn-cgi/image/format=auto/https://www.datocms-assets.com/70931/1755802228-img_3508_kawano-bag-of-the-month-ll.jpg?auto=format&w=900
Contents
While looking through the project archives for Handwoven, I stumbled upon the beautiful Drawstring Shoulder Bag you see in the photo above, which was woven on what designer Marie Kawano called a peg loom. When I think of a peg loom, I think of a loom like a pin loom with wooden pegs, but the loom used for this particular project was a frame loom with pins (pegs) at the top and bottom. Interestingly, I learned that not only could this bag be woven on a frame loom, but it could also be woven on a rigid-heddle loom.
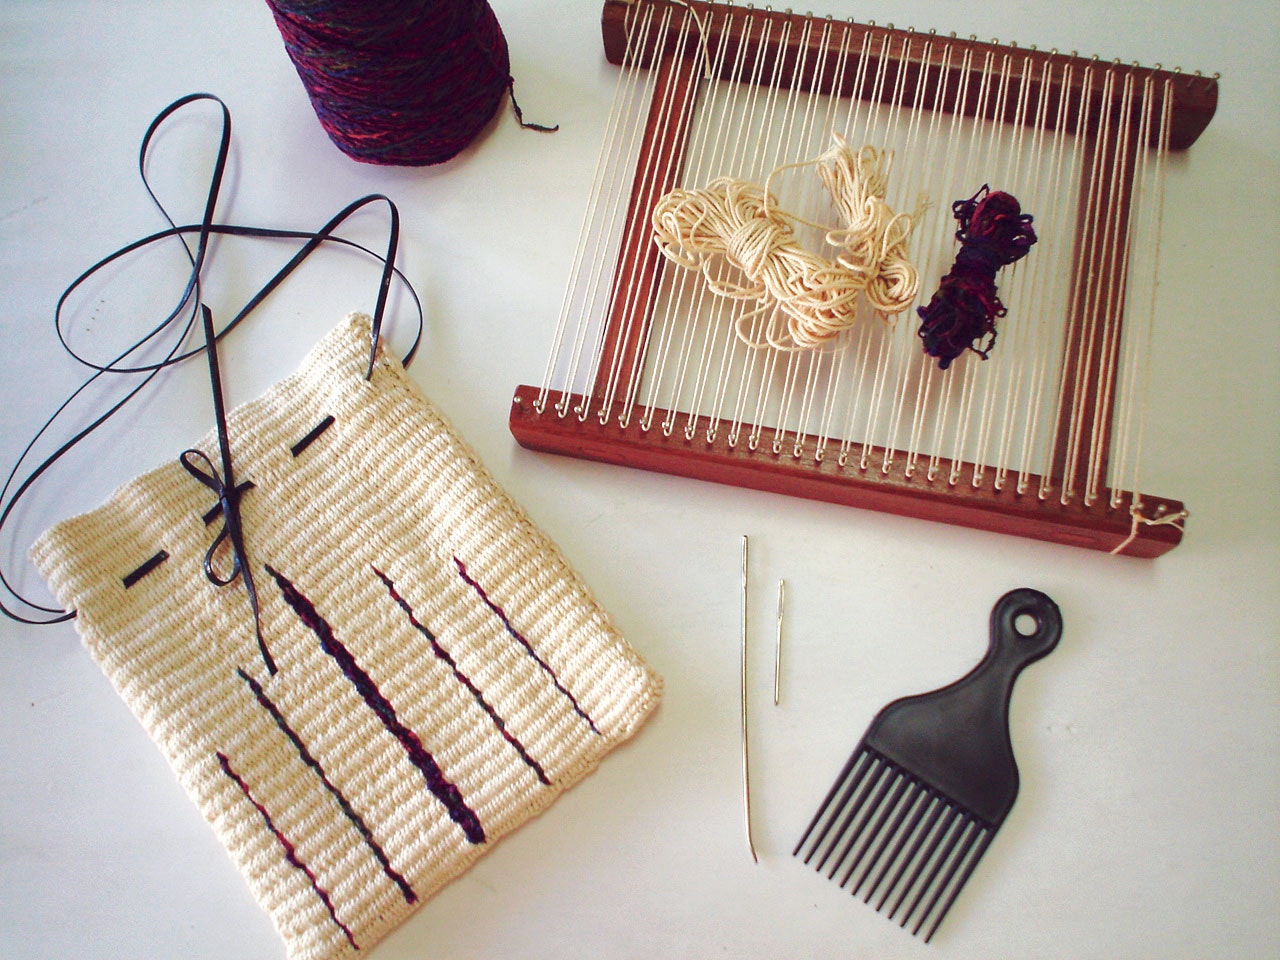 The Drawstring Shoulder Bag and the tools Marie used to weave it, including what she describes as a peg loom.
The bag was such a fun project, I knew I had to translate the instructions, and the result is this super-fun subscriber-exclusive project! (Not a subscriber yet? Learn more about our different subscription options here.) Read on to find out how the project was originally woven, how to weave the project on a frame or rigid-heddle loom, and how to make your own peg loom if you want to weave it as the designer originally did.
Frame-Loom Modifications
SUBSCRIBER EXCLUSIVE
While looking through the project archives for Handwoven, I stumbled upon the beautiful Drawstring Shoulder Bag you see in the photo above, which was woven on what designer Marie Kawano called a peg loom. When I think of a peg loom, I think of a loom like a pin loom with wooden pegs, but the loom used for this particular project was a frame loom with pins (pegs) at the top and bottom. Interestingly, I learned that not only could this bag be woven on a frame loom, but it could also be woven on a rigid-heddle loom.
The Drawstring Shoulder Bag and the tools Marie used to weave it, including what she describes as a peg loom.
The bag was such a fun project, I knew I had to translate the instructions, and the result is this super-fun subscriber-exclusive project! (Not a subscriber yet? Learn more about our different subscription options here.) Read on to find out how the project was originally woven, how to weave the project on a frame or rigid-heddle loom, and how to make your own peg loom if you want to weave it as the designer originally did.
Frame-Loom Modifications
[PAYWALL]
For this project, Kawano warped her loom by going up, around a pin, down, around a pin, and repeated that for the whole of the warp. Because the pins are so fine, you end up with a warp that’s not parallel, but rather a series of Vs where one side is straight up and down and the other at an angle. As a result, at the top of the loom two warp ends might be right next to each other, but then at the bottom they might be significantly further apart—you can see exactly what I mean in the photo of the loom above. To get around this odd spacing, Kawano wove her weft over and under pairs of warp ends. So while the pins are 3/8" apart, her sett is actually 2-2/3 ends per inch (epi) rather than 5-1/3 epi.
What does this mean for frame looms? Instead of trying to weave exactly as Kawano did, you can instead warp your loom using a continuous doubled warp, making sure your ends are spaced 1/3"—1/2" apart. Now you can weave it as written, noting that Kawano wove over/under extra warp threads at the selvedge. Also, the loom Kawano used allowed her to weave a fabric with four selvedges. If you're using a frame loom that leaves you with fringe, follow the rigid-heddle instructions for weaving fringe back into the cloth.
Rigid-Heddle Modifications
If you’re using a rigid-heddle loom, direct warp your loom by pulling a loop through every third dent in an 8-dent heddle. For example, if you started with a slot, you’d thread like this: slot with end, skip hole, skip slot, hole with end, skip slot, skip hole, slot with end, and so on. Each loop of two threads will work as one warp end. For the denser selvedges, warp the first and last dents with four threads (two loops). It won’t be exactly the same as what Kawano did, but the difference will be negligible.
Making a Peg Loom
To make a bag the way this one is made, you can make a peg loom like the loom shown here. Pegs or nails hold the warp in place, and the weaving is done with a needle. You can make a peg loom by purchasing a sturdy picture frame 8 1/2" x 11". On each of the long sides, sink twenty-eight 3/4" nails with smooth round heads 3/8" apart and ¼" deep.
Weaving on a Peg Loom
The warp for a peg loom is a continuous thread. Tied to the first peg on one side, it is wound from peg to peg across the loom until the desired width is reached. The weaving is done with a needle. Threaded with the weft, the needle passes over and under pairs of warp threads, single warp threads, or even in some other arrangement, such as a twill. When the structure is plain weave, the needle returns by passing over the threads it went under and under the threads it went over in the previous row.
The weft is then pulled through the shed in an arc to accommodate weft takeup. To achieve the desired weft sett, a tapestry comb presses the weft into place. It must be pressed very firmly for weft-faced weaves like the one used for this bag. At the top of the weaving, extra weft is pressed in for the last few picks so that when the fabric is lifted off the pegs there is enough weft to spread into the spaces formerly occupied by the pegs.
After the fabric is removed, the weft can be gently moved toward the bottom and top to fill in the spaces left by the pegs. The result is a perfect woven rectangle with four secure selvedges.
Project-at-a-Glance
Weave structure: Plain weave.
Equipment: 8½" x 11" peg loom or frame loom (see Frame-Loom Modifications above) with 28 pegs, nails, or teeth 3/8" apart on each of the 11" sides; tapestry comb; tapestry needle; long darning needle or a 6" bent Navajo sacking needle. You can also weave the bag on a rigid-heddle loom with 11" weaving width; 8-dent heddle; 2 shuttles.
Yarns
Warp: 8/4 cotton carpet warp (1,680 yd/lb), natural, 27 yd for a frame loom; 71 yd for a rigid-heddle loom.
Weft: worsted-weight cotton yarn (400–1,000 yd/lb), 50–100 yd depending on thickness; the finer the yarn the more yarn you’ll need. (Choose from Peaches and Cream worsted weight at 840 yd/lb, Tahki Classic cable cotton at 1,000 yd/lb, or another thick natural cotton yarn.)
Accent weft: rayon chenille, 1,450 yd/lb, Wild Grape Combo (space dyed in purples, dark reds, and blues), 5 yd.
Notions and other materials: Unbleached cotton lining fabric 9" x 20", 80" length of leather or plastic cording for strap, matching sewing thread.
Warp order and length: 31 ends (55 working warp threads) wound on a frame loom to equal 8" length each. 29 ends (27 doubled ends and 2 quadrupled ends for a total of 58 working warp threads) 44" long if you are using a rigid-heddle loom (allows 20" loom waste).
Warp and weft spacing
Warp sett: 2-2/3 epi (1 doubled end in every third dent of an 8-dent on a rigid-heddle loom; sley four threads in the first and last dents.)
Width in the heddle: 10-7/8".
Weft sett: 20–30 ppi.
Woven length: 8" per bag face; 16" for woven fabric on a rigid-heddle loom measured under tension.
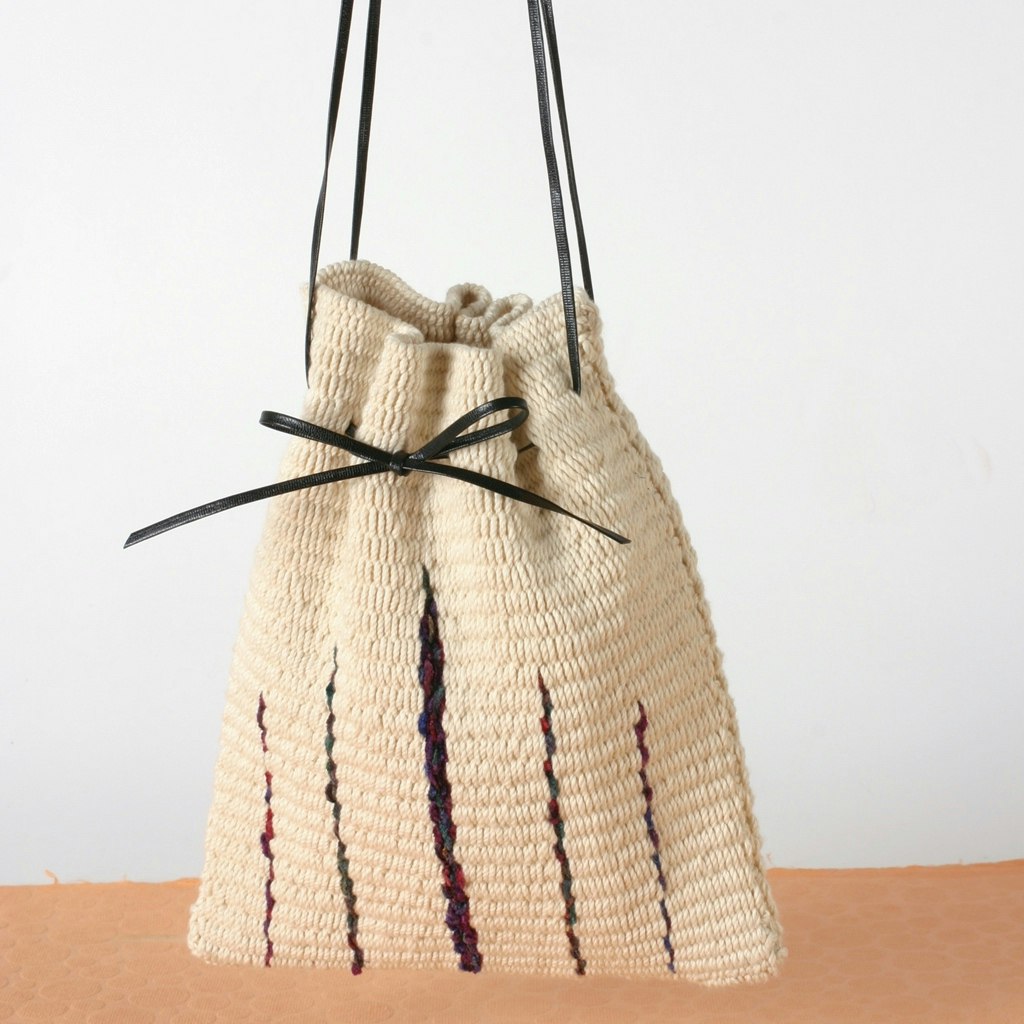
Finished dimensions: Amounts produce one bag 8" x 10" with a corded drawstring and strap.
Weaving Instructions
Peg loom: Wind the warp from the starting peg to the corresponding peg on the other side of the frame and back again until 28 pegs on both sides are included. Knot the end of the warp around the frame or the last peg.
Frame loom: Using a doubled warp thread, wind a continuous warp, spacing your doubled warp ends 1/3" to 1/2" apart for a sett of about 2-2/3 epi.
Rigid-heddle loom: Set up your loom for direct warping a length of 44". Centering for a weaving width of 10-7/8", begin by pulling four threads (2 loops) through the first slot or hole. Skipping two dents, thread two threads (1 loop). Continue threading every third dent with one loop per dent until you get to the last dent. In the last dent thread 4 threads (2 loops) as you did in the first dent.
Frame or peg loom: Weave the fabric using the natural cotton weft in plain weave aiming for about 24 picks per inch (or as close as possible for the thickness of your weft). Weave over and under pairs of warp threads throughout except for 3 single threads on one side and 4 single threads on the other (this will strengthen the edges).
Rigid-heddle loom: Wind your weft onto a shuttle. Spread the warp with scrap yarn. Weave in plain weaving aiming for a weft set of 24 picks per inch. You may want to use a weaving sword or pick-up stick to help you pack your weft in better.
For all looms, after 1-1/4", inlay the first chenille stripe: Beginning on the selvedge with 3 single ends on the peg or frame loom or on either selvedge on a rigid-heddle loom, take the chenille weft 4" into the warp and back out (2 picks of chenille). Weave 1-1/4" natural and then inlay 4 picks of chenille 5-1/2" into the warp for the second chenille stripe. Weave 1-1/4" natural and then inlay 8 picks of chenille 6-1/2" into the warp for the third stripe. Repeat the first two stripes in reverse order separated by 1-1/4" natural for five stripes of chenille. Let the chenille weft tails dangle from the back side.
Frame or peg loom: When you reach the end of the fabric and are weaving close to the pegs or teeth, press the last weft threads in as closely as possible, cut the weft, weave in the tail, and gently lift the woven rectangle off of the loom. Weave a second rectangle of fabric in the same way as the first. If you are using a frame loom that leaves fringe, follow the instructions for weaving in fringe for the rigid-heddle loom.
Rigid-heddle loom: When you have woven 16" with two sets of chenille stripes, remove the warp from the loom allowing about 5" fringe at each end. Using a tapestry needle, weave the warp threads on each end down into the cloth: Take one thread of each pair down along the adjacent warp thread on one side of the pair and the other thread down along the adjacent warp thread on the other side.
To construct the bag, place the two rectangles wrong sides together (the sides with the chenille weft tails) and use whipstitch to sew three sides together. The bottom of the bag is formed by the two selvedges where the 3 ends were woven singly and from which the chenille ends were entered. If you wove the fabric on a rigid-hedle loom, fold it in half joining the two raw edges and stitch them and the selvedges with 3 single threads together using a figure-eight stitch.
Cut the lining fabric 9" x 20". Fold it in half and sew side seams with a 1/2" seam allowance. Fold and press the top edge 1/2" to the outside and place the lining in the bag (wrong sides together). Attach a patch pocket to the right side of the lining if desired before placing it in the bag. Sew the lining to the bag around the top by hand, using an invisible stitch. The edge of the lining will be about 1/2" below the top edge of the bag.
Create a strap by threading the 80" length of cording in the darning needle and lacing it through the woven fabric about 1-1/2" from the top edge taking 1" stitches about 1" apart. Start on one side 1/2" from the center of the bag and bring the needle out of the last stitch 1" from where you started stitching. Tie the ends in a bow. Slide the cording so that the loops are even on both sides to use as straps.